Most life-changing reno yet!

Well, that was dramatic..but seriously…EVERY.SINGLE.DAY, I would get home from work with my purse, laptop bag, and maybe my Yeti or coffee mug and..the front door of our house would make me mad.

There were a few issues with the door that definitely made us want to get a new one:Grass Re-do 3

  1. When you opened the old door, it swung in the direction that everyone wants to go when they enter our house. The ONLY thing to the left was our master bedroom, then the door swung in, and blocked you from entering the house until the door was closed. It seems like such a small annoyance, but seriously..friends would come over with their babies in car seats, have to trudge into our master bedroom, close the door, Tucker would then greet them with his normal excitement and some jumping (ugh), and then they could finally walk in.
  2. Did I say Tucker was excited? The fact that there were four sidelights on each side made it so that if he jumped with enough enthusiasm, his paws would rest right at the bottom of the fourth window. When he was ready to start his quest to saying hi to our visitors, his paws would create HUGE scratches down the sidelights. #classy
  3. There was also some rot under the threshold and it was definitely not as insulated as we would have liked (ie, sometimes you could see daylight through some cracks in the sidelights), so it made the decision to get rid of the old door that much easier.

So…when we decided to start on our currently-going-on project (more on that soon!), we decided that a new front door DEFINITELY needed to happen.

Anyway, it was the easiest shopping decision ever. Josh and I immediately liked the same door, didn’t like anything else, bought it, and moved on. (I think that was a first!)

We chose this door from Lowe’s (and of course bought the option with sidelights on each side)

file

We also took the opportunity to grab two updated lights to boost our curb appeal a bit more, too! Yay! Josh and his friend Oscar knocked out the installation in a few hours while I went Christmas shopping and said it was a breeze! Thanks guys! 🙂

Most importantly, I don’t groan every time I have to bring groceries in because I open the door and the hallway to the kitchen is right there! And Tucker doesn’t jump up on the sidelights anymore because the windows on these are too high up for him! Wins all around!! 🙂

Renovation Realities

Hey guys..remember me? Remember how a year and a half ago (or more?) I posted a post about our next big project? Yeah, that’s me. HAAAY. So..update. We gave up on the mudroom.

  1. We got our drawings from D+D Studio (who is amazing by the way) and our permits through the city have been approved.

IMG_0485

2. We gutted the entire space, then Josh replaced and raised all of our ceiling beams. This will give us an additional foot or so of head room, which is amazing because we used to have to duck to make sure we didn’t hit our heads on the way down the stairs from the sunroom!!

IMG_0746

3. We replaced a bunch of boards that were completely rotted out.

4. We put in a new concrete slab and built the wall between the mudroom and the bathroom. We extended the bathroom walls out to hide the water heater.

5. Josh replaced all of the electrical and plumbing and added a TON of can lights!

6. We got a new washer and dryer because ours totally died.

Then…we gave up. Well..not really..We just got busy with life, got overwhelmed with this project that neither of us were particularly excited about, I quit my job and got my real estate license, and we threw in the towel and we’re not looking back. My first year as a REALTOR is done and we’ve officially started working on a completely different project now. One that we’re super excited about and won’t give up on. Thanks for stickin’ with us over all this time! I look forward to giving you an ACTUAL update on the house soon! I mean it! 🙂

Our New Garage Door!

You know you are jealous of this dirty, gross garage door.

20160216_084711.jpg20160216_084722.jpg

Oh..no? You aren’t? Color me surprised. Let’s not even mention that it didn’t open or close because the tracks were living on a prayer..Well, actually, one track was there..the second had an unfortunate encounter with Josh and it didn’t survive to tell the story. The ancient garage door opener also was not ruling at its’ job before the tracks went to hell.

20160216_091833.jpg

We got a few companies to come by to give us quotes, and we ended up deciding pretty quickly to go with Precision Overhead Garage Door service of Hampton Roads, who blew us away with their professionalism and fair pricing. They were rated #1 on Angie’s List so we knew they’d be good, but when an awesome guy named Chad came out to give us a quote, he explained things clearly and in regular-people terms so that I could understand them (since Josh was snoozin’ away because he was on night shift) AND explain them to Josh afterwards. He even gave us a “Good/Better/Best” quote at three different levels of door/features/etc. Another company gave us a quote before even measuring the door or going inside of the garage to check out the set up..AND they gave us the highest quote. WTF. Bye. Move along. Do not pass go. Do not collect $200. We also got a quote for us to DIY it and decided that the value Precision offered far exceeded the savings we’d get by doing it ourselves.

Anyway, we hired Precision, and it was worth every darn penny. They came out within a week and it was all set up and ready to go within a few hours. It was so nice…hiring people to finish things. 🙂 Despite a ton of rain, our technician (AH! I wish I would have written his name down) rocked it out. I kept going outside to offer him water/coffee/etc and he was so polite and awesome, even though he kept telling me “No.” Haha! He probably thought I was weird

pds-800-opener

^ That’s the new garage door opener.. 🙂

20160216_130800.jpg

20160216_131051.jpg

The new SUPER WHITE GARAGE DOOR makes it obvious how much we need to power wash the rest of the house this spring. Anyway, you know you are officially an adult when you stand in your driveway and record a video of your garage door opening and closing. I AM NOT ASHAMED! SO AWESOME!


If the videos don’t work, click these links!:

https://drive.google.com/file/d/1aI2R8aJ5fki19wztxUCw5236qmo0EjrKcg/view?usp=sharing

https://drive.google.com/file/d/14PaOAAryv1YoFaNFGO_D6cYgTIKn5496aA/view?usp=sharing


Party of 8!

Okay, so I’m going to start this post with a little bit of a #tbt because this is where our idea started…

We hosted Thanksgiving 2015 and once again, just like every other time we have more than 2 guests over to the house, we wished we had a larger dining room table!

IMG_4494
Custom napkins made by my Mother in Law!
IMG_4502
Our Thanksgiving Table!! 🙂

Josh then got the idea to build a new dining room table as his Christmas present to me. 🙂 He started it a week before Christmas Eve and worked on it secretly when I wasn’t around. Little did I know, he was aiming for it to be completed before Christmas Eve dinner.

Cue me being bossy and making him go do social things with me every night…so, the bench was done but he didn’t complete the table in time for Christmas Eve Dinner.

image

Of course, Distinctive Event Rentals came to the rescue for the dinner table and chair rentals. 🙂 I’m sad I didn’t get a picture, but just believe me when I say it looked good.

Anyway, after Christmas, we brought the table in to the dining room to check the sizing and such (and because we probably wouldn’t have been able to carry it with the table top on it-I have no idea how we’ll ever get it out of here…).

image

Josh realized after the bench was completely done that he made the bench 6 inches longer than it was planned to be, so then we added another 6 inches to the table to make the bench be able to be pushed under the table if we want..so then we got worried the table would be WAYYY too big for the room, which is probably is, but we are ignoring that because it is amazing.

We are thrilled because we went from having a TINY round table that only comfortably seated 4, to being able to have 8 full-sized adults at one table!! Success!

Reminder of the dining room table before…

IMG_0157

And here it is today…(Ignore the fact that the picture isn’t perfect..right now, the table is a dumping ground for all of our tax stuff..ick)

image

All the heart eyes!!! He made it from a modified Ana White plan and we bought the legs from Lowe’s! 🙂 He hand mixed the stain from two stain colors and used White Valspar Furniture paint for the legs. He’s the bomb..and I guarantee it will be the most used Christmas present EVER.


Our next HUGE project!

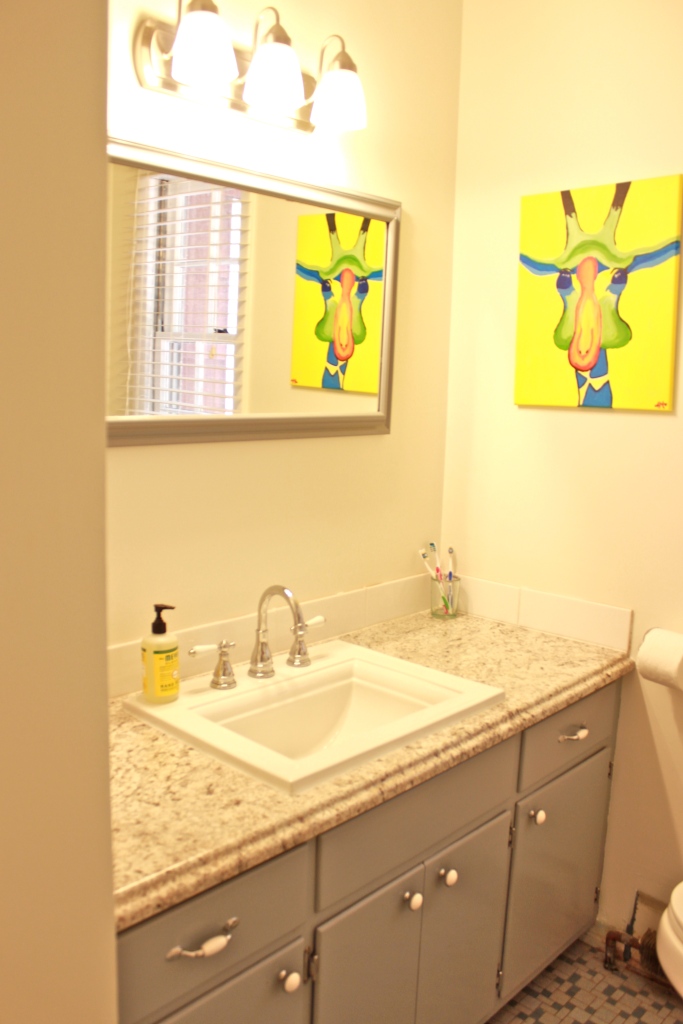
In 2015, we finished up many projects we’d started but hadn’t finished. Like painting the windows in the sunroom! And throwing together a home office for me! And painting the window and ceiling in the kitchen! And finishing the fence! And doing a mini makeover in the upstairs bathroom! And hanging up pictures! Oh, and spending about $4,500 on brickwork on our fireplace so that it would stop leaking when a big rainstorm came. And I realize I stunk at updating the blog about all of that, but it’s my blog and I won’t update unless I want to.

Telling ourselves that we couldn’t start another project until we finished everything that we had already started motivated us to get moving on the not-so-fun little projects so that we can get to planning the next big one!

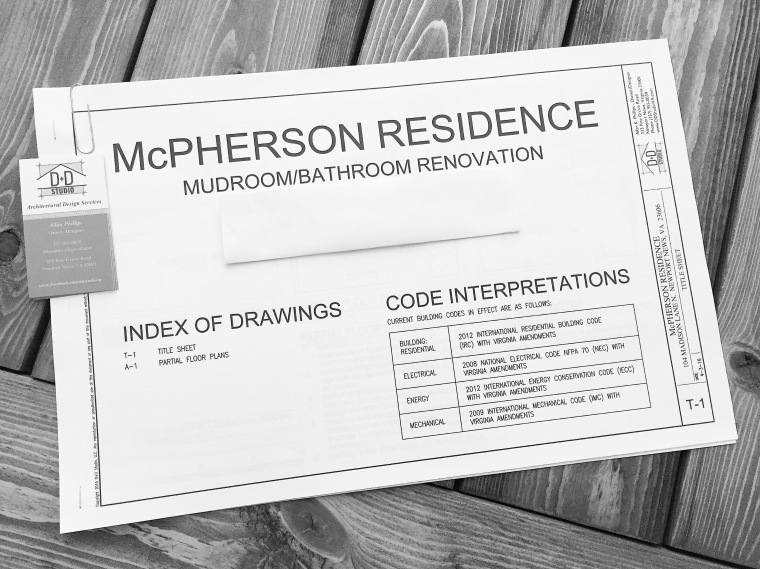
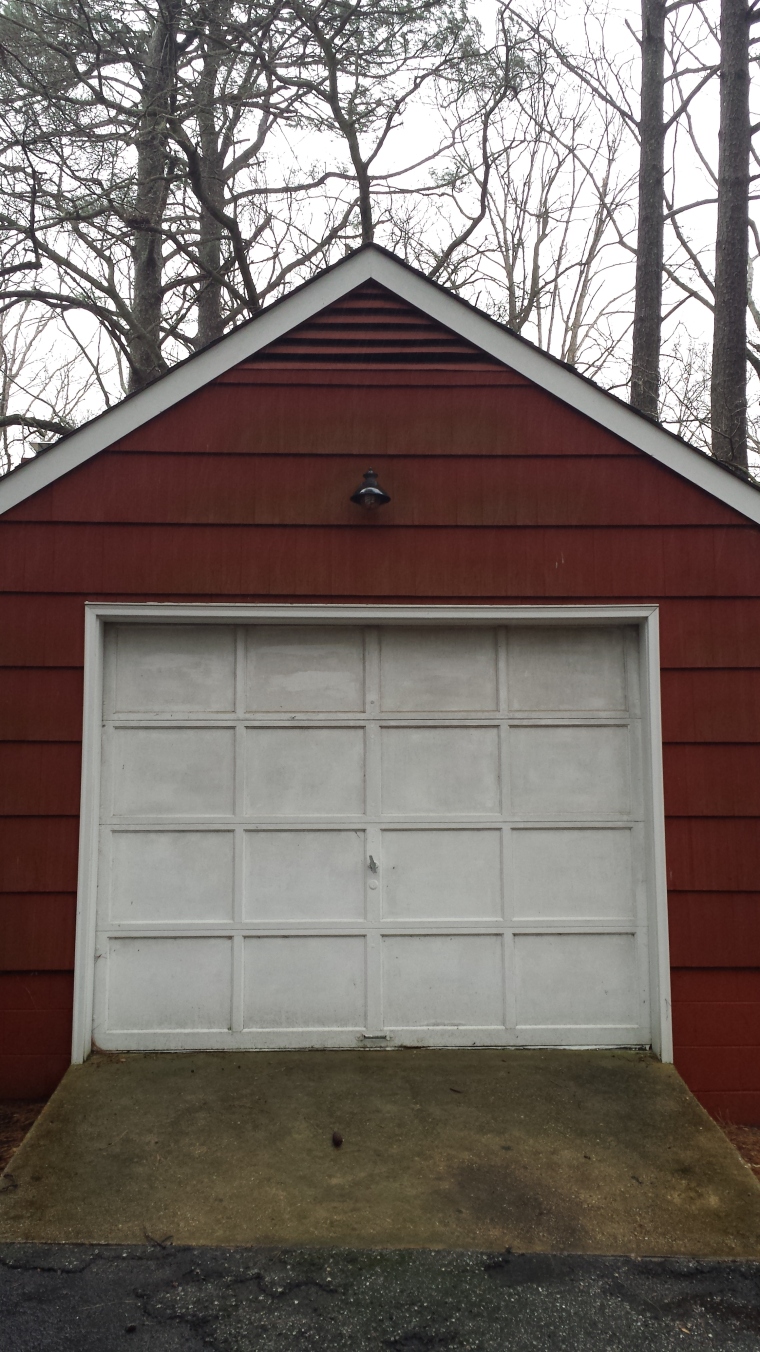
So..What is the next big project, you ask?? Our garage + laundry/mud room & attached bathroom. We haven’t talked about this room much in the past because, well…it is SO awful. On Josh’s first tour of the house, he couldn’t even find the “third bathroom” because..it is in here. And it is pretty well hidden. And the shower doesn’t work. We jokingly call the bathroom in here the killer bathroom..you’ll see why.

Here..let me take you on a tour so you see what I’m saying. PARDON THE MESS, YA’LL! It’s a garage..don’t judge us!

So, it is completely non-functional. We don’t use the space to its’ fullest potential. It’s awkward. It’s blue. AND WE ARE GOING TO CHANGE ALL OF THAT!

Here are the original list of to-do’s for this space when we bought the house:

Garage:

Add Peg boards/Organization

Laundry Room:

Create folding area or Island with built in storage for baskets

Paint and organize cabinets

Paint floor with a fun design or stripes

Renovate bathroom space

Aw, look how cute I was. This is what we will (likely) be doing now:

Garage:

Build or Buy and Install a new garage door (since we broke the track for our current one and would like to have a different style out front): Getting quotes now!

Peg Board Organization for Tools

Add boards to beams above for extra storage

Build Shelves for tools, paint, & crap that shouldn’t be in the mudroom/laundry room space

Build a Fold up Work Bench

Perhaps some new lighting?

Move some junk out into our shed

Laundry Room/Mud Room/Bathroom:

Gut entire space down to studs (wall boards down, ceiling down, cabinets down-some have already been taken down over our washer because of a washer malfunction we had a few months back, shelving down)

New flooring (Ceramic Tile? Peel & Stick? We’re not sure yet but we know it won’t be wood)

Re-wire & Re-Plumb everything to get up to current code

Insulate everything (Getting out of the shower in the middle of winter in an uninsulated space sounds…delightful!)

Install new windows (three total)

Drywall and/or Beadboard Walls

Figure out ceiling-Drywall?

Install new functional lighting

Bathroom Specifics:

New Walk-in Shower along back wall

Add Second Shower Head for Dog Washing (prettttyyy please?! This is definitely a “wish list” item, but would be SO nice since Jimmy Dean hates water and runs away from us every time we try to bathe him.)

New Toilet

New Sink/Vanity

New Mirror

Curtain/covering for the window

Laundry & Mudroom Area Specifics: This is hopefully the area that we will use as our normal day to day entryway.

Refurbish/reglaze the vintage sink (if possible)

Build New Cabinets/Shelves: Wall o’ Cabinets to store our linens, towels, Emergency Kit, All of the stuff we buy in bulk like toilet paper and paper towels, etc!

Drying Line of some sort for Laundry

Large Countertop for folding with Laundry Basket Storage

Possible new water heater and boiler if budget allows (we would need natural gas to be run from the street to the house, plus re-running our baseboard heater piping to work with a boiler in this space. The current boiler is under our stairs which isn’t to current code and is oil-based, so we do not currently use it.)

Storage for Shoes & Bench for putting on shoes, Umbrellas, etc.

It should be an adventure!! We are looking forward to getting started once we know spring is here and our pipes won’t burst!! 🙂

China Cabinet Makeover

In June, I was doing my normal craigslist stalking, which usually starts once I see a post over at Emily Henderson. She does these Craigslist posts in random cities every now and again and she (well, probably her team of interns/assistants) finds the most amazing furniture pieces! Our local craigslist has pretty slim pickin’s most of the time, but sometimes you can find hidden gems if you stalk hard enough.

One day, I saw a posting of a “Small Antique China Cabinet” and I was pretty much sold before I even saw the picture of it. Our dining room isn’t exactly massive, so size did matter & a lot of the china cabinets I saw on CL before were humongous! It was $50, so I reached out right away to try to schedule a time to see it. The seller was available the next day, so off Josh and I went to see it on the way to a friend’s birthday party. Of course, I was trying not to get my hopes up, but it’s been five years since our wedding and we’ve used our China a grand total of ONE TIME, so having it on display got me all excited (it’s so preeeettttyyy!).

The cabinet was covered in cobwebs in the seller’s garage, but overall, it was in pretty good shape, so we paid full price. I so wish I was a better haggler, but whatever. Since we were already half way to the party, we decided we’d keep the cabinet in the back of the truck while we were at the party and then unload it when we got home, rather than take the extra time to just drive it home. MISTAKE.

A freak thunderstorm came through the area and even though Josh went back to the truck to cover it with a tarp, the front of the cabinet already had some marks from where water started puddling. Woops. Anyway, here is the before picture after we had removed the front doors/drawers and cleaned it about a hundred times!

wpid-20150801_120028.jpg

We pretty much went full-on pinterest for this project.

White Chalk paint (using a DIY recipe)

+ China Cabinet

+ Different Color on the inside of the cabinet

= success!

wpid-20150809_170116.jpg

We used the original hardware mostly because we were too lazy to try to find new hardware, but we cleaned them up by soaking them in Dawn for awhile. We did manage to buy new hinges because the old ones were pretty rusty.

For those that are curious, we used this DIY Chalk Paint Recipe – There are a ton of different recipes, but Plaster of Paris is cheap, so I went with this one. Overall, it was pretty easy to use and stuck to the cabinet without having to prime! I have never used Annie Sloan Chalk Paint before, but I doubt I ever will because making it myself was easy enough and I don’t have any complaints about the finish.

For paint colors, we used 1 and a half qts. of Behr Ultra Premium Plus in Painter’s White (Matte) and for the backing we used 2 of the small sample sized containers of Behr Ultra Premium Plus in Fresh Day (Matte).

One thing we did to differently than most of the Pinterest projects we saw was we added LED lights to illuminate the display area of the cabinet. We used these Sylvania Mosaic LED lights which you can find at Lowe’s! They even have a remote control & the lights can change colors (more on that later in the post).

wpid-20150809_155357.jpg

Not sure if you can see it in the pictures above but where each of the shelves were had a glaringly obvious beam of light, so we used Black electrical tape to cover it up so it would look less harsh.

So..remember how I said the lights change color? Now, we have our very own dinner entertainment for our guests to enjoy 😉

Second oopsy of this project was when we were reinstalling the painted trim around the glass door for the middle-top section of the cabinet. We broke the glass, so we are looking in to getting it replaced and then we’ll be 100% done with it. 🙂 I won’t hold my breath because we still haven’t 100% finished the kitchen we started on two years ago.

Once we get the glass replaced, I’ll have the final final total for this, but I’m pretty sure it will fall below the $150 mark! Holla.

I promise I’ll be back with some more updates. Pinky swear.

Downstairs Bathroom Round 1: DONE!

Hey pals..the last in-house update was when we were starting the downstairs bathroom around Christmas time! Here are a few before photos for your viewing pleasure:

Downstairs BA Before 3

Downstairs BA Before 1

Downstairs BA Before 4

You know you’re jealous of that bathroom. Just admit it.

So, we painted the room, mirror, and cabinets, installed the new light fixture, a new countertop, and a new sink/faucet! Voila!

Downstairs BA After 1
Yes, we need to paint and install the baseboard heater cover! Thanks for mentioning it.

Downstairs BA after 3

We ended up breaking the backsplash off of the countertop when we were cutting the countertop down to size, so we installed a row of white subway tile backsplash for now. Eventually we are going to do a full renovation on this bathroom (re-work the layout, add a shower/bath, full gut job), so we didn’t want to spend too much on anything that would be a temporary placeholder.

Downstairs BA After 5

The finishing touch was the installation of my beautiful “Paint Nite/Wine & Design” paintings, too, which I am now calling my “Crappy Art Gallery.” 🙂 Speaking of which, I want to add to my gallery, so anyone who wants to go drink and paint with me..holla at me!

Even though it took me 5 months to actually blog about this bad boy-it only took us a few days (and about $400) to complete, which was refreshing after months and months of working on the living room/sunroom (and still not being finished. joy!).

We got a puppy…

image

Lots of changes here at the Whole Damn House…that’s Jimmy Dean!  He’s our new pup and the reason we expedited our fence building project.

image

image

image

image

We used our huge stack of wood to mask the fact that one of those posts was installed out of line to avoid a tree root. Holla!

We have only fully completed and stained the run pictured and have about 3x that amount to go. After installing the wood and staining, we are also attaching weld wire so that the dogs can’t get out. YAY! I can’t wait for the day I can let them out without worrying that they will run after a squirrel into neighbor’s yards/the street/etc. More details soon!

Starting the Downstairs Bathroom

I must be honest with you all. My sweet husband has turned me into a crazy person. Sometimes we hit points in our renovations where I feel like I can’t help. Whether it is a project I don’t feel comfortable doing or one that Josh has a specific vision/plan for, sometimes I find myself doing the other things that need to be done around the house like laundry, dishes, etc. This is all fine and dandy except when I get bored doing those things. That is when I start to get boo-hooey/lazy/bratty and make Josh take a brainstorming trip to Lowe’s/Home Depot with me.

When we take a brainstorming trip, I create new projects for myself to do while Josh works on “his” projects. This is how our bathroom renovation started. I mentioned wanting to look at paint colors for the bathroom cabinets and walls. It then turned in to us looking at light fixtures, countertops, and sinks. We got paint swatches and left, but after brainstorming store trips, I always come back in to the house renewed and ready to work. Measurements were taken, colors were decided, and we got to work.

Here are some before pictures for you to feast your eyes on!

Downstairs BA Before 1  Downstairs BA Before 3 Downstairs BA Before 4

For the walls, we chose Behr Ultra Premium Plus in Snowy Pine:

Behr Premium Plus Ultra Snowy Pine
Photo from www.HomeDepot.com

and for the cabinets, we chose Behr Marquee Silent Film:

Behr Marquee Silent Film
Photo from www.HomeDepot.com

All of the trim is painted with the same Behr Premium Plus Ultra in Ultra Pure White that we’ve been using through the rest of the house.

First, we took down the upper cabinets and lights to open up the space a bit. Doing this also removed the two outlets that were housed on the bottom of the cabinets. The power was run from the light box down the inside of the cabinets. They were a bit awkward from the beginning, but we didn’t want to completely lose outlets in the room. After a bit of research, we installed a new fan switch that also had an outlet below, so that I am still able to use a blow dryer/straightener in the bathroom. This made it so that we wouldn’t have to completely run new power. Shortcuts that work for the win!

Downstairs BR Mid-Way 3

We’ll be painting the mirror the same color as the cabinets!

Downstairs BA Hardware

We ordered a gorgeous sink from Wayfair

and bought a countertop from Lowe’s that we will be cutting down to size (cross your fingers we don’t mess it up! We definitely have a chance of messing up the backsplash since all of the modern countertops are too deep for our bathroom. We will be cutting the back end off and trying to reuse the backsplash. If we mess it up, we will likely do a tile backsplash, but..just cross your fingers we don’t mess up the countertop. 🙂

Photo from www.Lowes.com
Photo from http://www.Lowes.com