
Well, that was dramatic..but seriously…EVERY.SINGLE.DAY, I would get home from work with my purse, laptop bag, and maybe my Yeti or coffee mug and..the front door of our house would make me mad. There were… More

what we've been up to at the whole damn house :
Well, that was dramatic..but seriously…EVERY.SINGLE.DAY, I would get home from work with my purse, laptop bag, and maybe my Yeti or coffee mug and..the front door of our house would make me mad. There were… More

Hey guys..remember me? Remember how a year and a half ago (or more?) I posted a post about our next big project? Yeah, that’s me. HAAAY. So..update. We gave up on the mudroom. We got… More

You know you are jealous of this dirty, gross garage door. Oh..no? You aren’t? Color me surprised. Let’s not even mention that it didn’t open or close because the tracks were living on a prayer..Well,… More

Okay, so I’m going to start this post with a little bit of a #tbt because this is where our idea started…
We hosted Thanksgiving 2015 and once again, just like every other time we have more than 2 guests over to the house, we wished we had a larger dining room table!


Josh then got the idea to build a new dining room table as his Christmas present to me. 🙂 He started it a week before Christmas Eve and worked on it secretly when I wasn’t around. Little did I know, he was aiming for it to be completed before Christmas Eve dinner.
Cue me being bossy and making him go do social things with me every night…so, the bench was done but he didn’t complete the table in time for Christmas Eve Dinner.

Of course, Distinctive Event Rentals came to the rescue for the dinner table and chair rentals. 🙂 I’m sad I didn’t get a picture, but just believe me when I say it looked good.
Anyway, after Christmas, we brought the table in to the dining room to check the sizing and such (and because we probably wouldn’t have been able to carry it with the table top on it-I have no idea how we’ll ever get it out of here…).

Josh realized after the bench was completely done that he made the bench 6 inches longer than it was planned to be, so then we added another 6 inches to the table to make the bench be able to be pushed under the table if we want..so then we got worried the table would be WAYYY too big for the room, which is probably is, but we are ignoring that because it is amazing.
We are thrilled because we went from having a TINY round table that only comfortably seated 4, to being able to have 8 full-sized adults at one table!! Success!
Reminder of the dining room table before…

And here it is today…(Ignore the fact that the picture isn’t perfect..right now, the table is a dumping ground for all of our tax stuff..ick)

All the heart eyes!!! He made it from a modified Ana White plan and we bought the legs from Lowe’s! 🙂 He hand mixed the stain from two stain colors and used White Valspar Furniture paint for the legs. He’s the bomb..and I guarantee it will be the most used Christmas present EVER.

In 2015, we finished up many projects we’d started but hadn’t finished. Like painting the windows in the sunroom! And throwing together a home office for me! And painting the window and ceiling in the kitchen! And finishing the fence! And doing a mini makeover in the upstairs bathroom! And hanging up pictures! Oh, and spending about $4,500 on brickwork on our fireplace so that it would stop leaking when a big rainstorm came. And I realize I stunk at updating the blog about all of that, but it’s my blog and I won’t update unless I want to.
Telling ourselves that we couldn’t start another project until we finished everything that we had already started motivated us to get moving on the not-so-fun little projects so that we can get to planning the next big one!
So..What is the next big project, you ask?? Our garage + laundry/mud room & attached bathroom. We haven’t talked about this room much in the past because, well…it is SO awful. On Josh’s first tour of the house, he couldn’t even find the “third bathroom” because..it is in here. And it is pretty well hidden. And the shower doesn’t work. We jokingly call the bathroom in here the killer bathroom..you’ll see why.
Here..let me take you on a tour so you see what I’m saying. PARDON THE MESS, YA’LL! It’s a garage..don’t judge us!


So, it is completely non-functional. We don’t use the space to its’ fullest potential. It’s awkward. It’s blue. AND WE ARE GOING TO CHANGE ALL OF THAT!
Here are the original list of to-do’s for this space when we bought the house:
Garage:
Add Peg boards/Organization
Laundry Room:
Create folding area or Island with built in storage for baskets
Paint and organize cabinets
Paint floor with a fun design or stripes
Renovate bathroom space
Aw, look how cute I was. This is what we will (likely) be doing now:
Garage:
Build or Buy and Install a new garage door (since we broke the track for our current one and would like to have a different style out front): Getting quotes now!
Peg Board Organization for Tools
Add boards to beams above for extra storage
Build Shelves for tools, paint, & crap that shouldn’t be in the mudroom/laundry room space
Build a Fold up Work Bench
Perhaps some new lighting?
Move some junk out into our shed
Laundry Room/Mud Room/Bathroom:
Gut entire space down to studs (wall boards down, ceiling down, cabinets down-some have already been taken down over our washer because of a washer malfunction we had a few months back, shelving down)
New flooring (Ceramic Tile? Peel & Stick? We’re not sure yet but we know it won’t be wood)
Re-wire & Re-Plumb everything to get up to current code
Insulate everything (Getting out of the shower in the middle of winter in an uninsulated space sounds…delightful!)
Install new windows (three total)
Drywall and/or Beadboard Walls
Figure out ceiling-Drywall?
Install new functional lighting
Bathroom Specifics:
New Walk-in Shower along back wall
Add Second Shower Head for Dog Washing (prettttyyy please?! This is definitely a “wish list” item, but would be SO nice since Jimmy Dean hates water and runs away from us every time we try to bathe him.)
New Toilet
New Sink/Vanity
New Mirror
Curtain/covering for the window
Laundry & Mudroom Area Specifics: This is hopefully the area that we will use as our normal day to day entryway.
Refurbish/reglaze the vintage sink (if possible)
Build New Cabinets/Shelves: Wall o’ Cabinets to store our linens, towels, Emergency Kit, All of the stuff we buy in bulk like toilet paper and paper towels, etc!
Drying Line of some sort for Laundry
Large Countertop for folding with Laundry Basket Storage
Possible new water heater and boiler if budget allows (we would need natural gas to be run from the street to the house, plus re-running our baseboard heater piping to work with a boiler in this space. The current boiler is under our stairs which isn’t to current code and is oil-based, so we do not currently use it.)
Storage for Shoes & Bench for putting on shoes, Umbrellas, etc.
It should be an adventure!! We are looking forward to getting started once we know spring is here and our pipes won’t burst!! 🙂

In June, I was doing my normal craigslist stalking, which usually starts once I see a post over at Emily Henderson. She does these Craigslist posts in random cities every now and again and she (well, probably her team of interns/assistants) finds the most amazing furniture pieces! Our local craigslist has pretty slim pickin’s most of the time, but sometimes you can find hidden gems if you stalk hard enough.
One day, I saw a posting of a “Small Antique China Cabinet” and I was pretty much sold before I even saw the picture of it. Our dining room isn’t exactly massive, so size did matter & a lot of the china cabinets I saw on CL before were humongous! It was $50, so I reached out right away to try to schedule a time to see it. The seller was available the next day, so off Josh and I went to see it on the way to a friend’s birthday party. Of course, I was trying not to get my hopes up, but it’s been five years since our wedding and we’ve used our China a grand total of ONE TIME, so having it on display got me all excited (it’s so preeeettttyyy!).
The cabinet was covered in cobwebs in the seller’s garage, but overall, it was in pretty good shape, so we paid full price. I so wish I was a better haggler, but whatever. Since we were already half way to the party, we decided we’d keep the cabinet in the back of the truck while we were at the party and then unload it when we got home, rather than take the extra time to just drive it home. MISTAKE.
A freak thunderstorm came through the area and even though Josh went back to the truck to cover it with a tarp, the front of the cabinet already had some marks from where water started puddling. Woops. Anyway, here is the before picture after we had removed the front doors/drawers and cleaned it about a hundred times!

We pretty much went full-on pinterest for this project.
White Chalk paint (using a DIY recipe)
+ China Cabinet
+ Different Color on the inside of the cabinet
= success!

We used the original hardware mostly because we were too lazy to try to find new hardware, but we cleaned them up by soaking them in Dawn for awhile. We did manage to buy new hinges because the old ones were pretty rusty.
For those that are curious, we used this DIY Chalk Paint Recipe – There are a ton of different recipes, but Plaster of Paris is cheap, so I went with this one. Overall, it was pretty easy to use and stuck to the cabinet without having to prime! I have never used Annie Sloan Chalk Paint before, but I doubt I ever will because making it myself was easy enough and I don’t have any complaints about the finish.
For paint colors, we used 1 and a half qts. of Behr Ultra Premium Plus in Painter’s White (Matte) and for the backing we used 2 of the small sample sized containers of Behr Ultra Premium Plus in Fresh Day (Matte).
One thing we did to differently than most of the Pinterest projects we saw was we added LED lights to illuminate the display area of the cabinet. We used these Sylvania Mosaic LED lights which you can find at Lowe’s! They even have a remote control & the lights can change colors (more on that later in the post).

Not sure if you can see it in the pictures above but where each of the shelves were had a glaringly obvious beam of light, so we used Black electrical tape to cover it up so it would look less harsh.
So..remember how I said the lights change color? Now, we have our very own dinner entertainment for our guests to enjoy 😉
Second oopsy of this project was when we were reinstalling the painted trim around the glass door for the middle-top section of the cabinet. We broke the glass, so we are looking in to getting it replaced and then we’ll be 100% done with it. 🙂 I won’t hold my breath because we still haven’t 100% finished the kitchen we started on two years ago.
Once we get the glass replaced, I’ll have the final final total for this, but I’m pretty sure it will fall below the $150 mark! Holla.
I promise I’ll be back with some more updates. Pinky swear.

Hey pals..the last in-house update was when we were starting the downstairs bathroom around Christmas time! Here are a few before photos for your viewing pleasure:

You know you’re jealous of that bathroom. Just admit it.
So, we painted the room, mirror, and cabinets, installed the new light fixture, a new countertop, and a new sink/faucet! Voila!


We ended up breaking the backsplash off of the countertop when we were cutting the countertop down to size, so we installed a row of white subway tile backsplash for now. Eventually we are going to do a full renovation on this bathroom (re-work the layout, add a shower/bath, full gut job), so we didn’t want to spend too much on anything that would be a temporary placeholder.
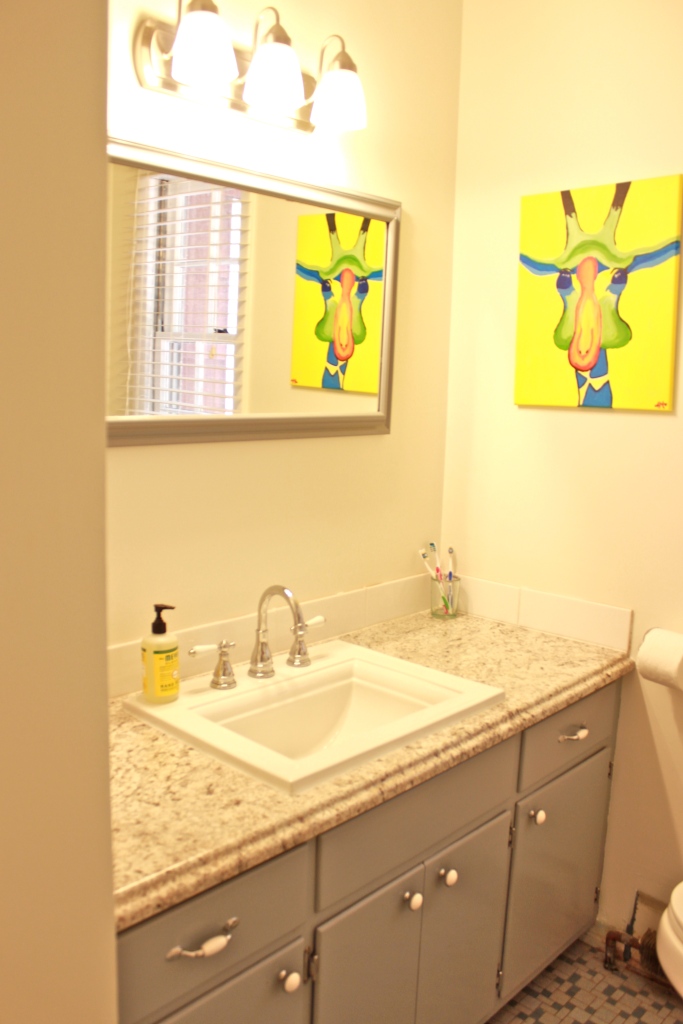
The finishing touch was the installation of my beautiful “Paint Nite/Wine & Design” paintings, too, which I am now calling my “Crappy Art Gallery.” 🙂 Speaking of which, I want to add to my gallery, so anyone who wants to go drink and paint with me..holla at me!
Even though it took me 5 months to actually blog about this bad boy-it only took us a few days (and about $400) to complete, which was refreshing after months and months of working on the living room/sunroom (and still not being finished. joy!).

Lots of changes here at the Whole Damn House…that’s Jimmy Dean! He’s our new pup and the reason we expedited our fence building project.


We used our huge stack of wood to mask the fact that one of those posts was installed out of line to avoid a tree root. Holla!
We have only fully completed and stained the run pictured and have about 3x that amount to go. After installing the wood and staining, we are also attaching weld wire so that the dogs can’t get out. YAY! I can’t wait for the day I can let them out without worrying that they will run after a squirrel into neighbor’s yards/the street/etc. More details soon!
Love this! So true, too!
You Know You're Living in a Construction Zone When...
you have trouble remembering to use the door and not to walk through the wall.
I must be honest with you all. My sweet husband has turned me into a crazy person. Sometimes we hit points in our renovations where I feel like I can’t help. Whether it is a project I don’t feel comfortable doing or one that Josh has a specific vision/plan for, sometimes I find myself doing the other things that need to be done around the house like laundry, dishes, etc. This is all fine and dandy except when I get bored doing those things. That is when I start to get boo-hooey/lazy/bratty and make Josh take a brainstorming trip to Lowe’s/Home Depot with me.
When we take a brainstorming trip, I create new projects for myself to do while Josh works on “his” projects. This is how our bathroom renovation started. I mentioned wanting to look at paint colors for the bathroom cabinets and walls. It then turned in to us looking at light fixtures, countertops, and sinks. We got paint swatches and left, but after brainstorming store trips, I always come back in to the house renewed and ready to work. Measurements were taken, colors were decided, and we got to work.
Here are some before pictures for you to feast your eyes on!


For the walls, we chose Behr Ultra Premium Plus in Snowy Pine:

and for the cabinets, we chose Behr Marquee Silent Film:

All of the trim is painted with the same Behr Premium Plus Ultra in Ultra Pure White that we’ve been using through the rest of the house.
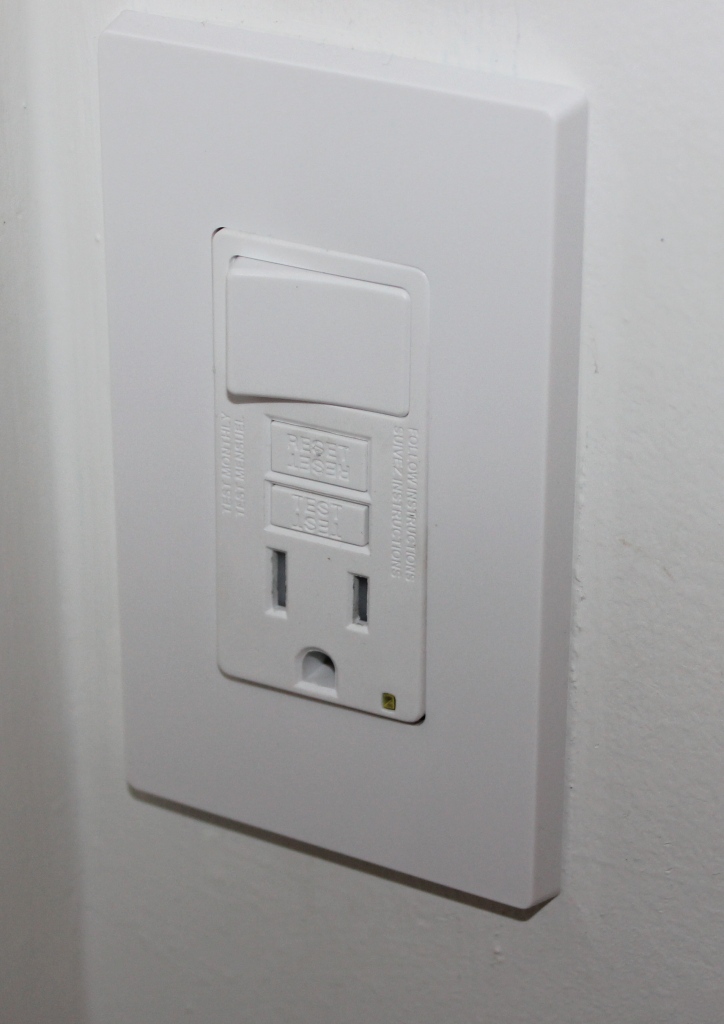
First, we took down the upper cabinets and lights to open up the space a bit. Doing this also removed the two outlets that were housed on the bottom of the cabinets. The power was run from the light box down the inside of the cabinets. They were a bit awkward from the beginning, but we didn’t want to completely lose outlets in the room. After a bit of research, we installed a new fan switch that also had an outlet below, so that I am still able to use a blow dryer/straightener in the bathroom. This made it so that we wouldn’t have to completely run new power. Shortcuts that work for the win!


We ordered a gorgeous sink from Wayfair
and bought a countertop from Lowe’s that we will be cutting down to size (cross your fingers we don’t mess it up! We definitely have a chance of messing up the backsplash since all of the modern countertops are too deep for our bathroom. We will be cutting the back end off and trying to reuse the backsplash. If we mess it up, we will likely do a tile backsplash, but..just cross your fingers we don’t mess up the countertop. 🙂


As a wedding professional, I’ve heard a lot of best man/ maid of honor speeches start out with, “For those of you who don’t know me…” It is almost a joke among wedding vendors because approximately 98.74% of the speeches begin with that statement. I’m pretty sure I started my speech at my best friend’s wedding with it (photo above)..and I almost started this blog post with it.
It is because introductions are awkward. When you are standing in the middle of a dance floor in front of 150 of your BFF’s favorite people staring back at you it is almost as awkward as writing something on a blog that hypothetically 3 billion people in the world could read. You put yourself out there in both situations. And in both situations people could think what you are saying is stupid. So you start it off with, “For those of you who don’t know me…”
Well, I’m not starting this blog post with it because I figure if someone thinks what I am saying is stupid, you can click the X up at the top of your internet-browser-of-choice window. HA. This is our corner of the internet, suckers. And mostly, this blog is for us (me).
The Whole Damn House is a home blog that is here to document our journey improving our first home. Mostly, it is so that we can see our progress and remind ourselves that living through a construction zone is worth it. Seeing before photos after progress is made is a seriously powerful motivator. This blog also gives us the opportunity to keep our families and friends updated without having to monopolize phone conversations, connect with other fixer upper or non-fixer upper homeowners, and hopefully make a few folks laugh at our expense. 🙂 We like having people laugh with us. Maybe one day we will get to the point where you might learn something about home improvement, but..we’ll see. I’d need to convince Josh to write things here if you want to learn anything. 🙂
So. Hey! I’m Alison and I am the one who writes things here. Josh is my husband and he is the bossy one (haha, just kidding! That’s me, too!). He’s the one that has actual home improvement talent and is teaching me things everyday. In 2014, I used a nail gun for the first time and it was FUN. Our dog Tucker is along for the ride whether he likes it or not because we continue to feed him.
This is us when we were young(er) and in love. (Yes, this is from High School)

Why did we name it The Whole Damn House? Two reasons.
1. We have to re-do the whole damn house, and
2. Josh graduated from Virginia Military Institute. At VMI, one of the cheers they do during sporting events ends in “Whole Damn Team.” When discussing buying this house, Josh was wearing one of his VMI shirts that had the phrase on it, and I giggled about how we were about to buy a house where we needed to renovate the whole damn thing. So…I started the blog. I hope VMI doesn’t come after me with a cease and desist letter because then..See #1. (We’ve donated!! Love ya!)

One of my goals for 2015 is to blog more often. I signed up for Blogging101 through WordPress to learn more about this fabulous platform, get on a more frequent posting schedule and explore blogging in a new and different way. You’ll be seeing you’ll more posts coming through over here in our little weird corner of the internet. 🙂 Some may be random, some may be funny..I have no idea since WP is taking me (and a few thousand other bloggers) on the journey and assigning things day by day.
On the Wednesday before Christmas, I went to Target to go shopping on my lunch break. My phone rang and it was a number I did not recognize, but I remembered the folks over at North Carolina Furniture and Mattress were going to call mid-way through our couch wait to give us a status update. I answered and they let me know the couches were in early! And they could deliver tonight, if we were available! Uh, twist my arm, whydontyou. When they arrived, we hovered over the delivery guys like nobody’s business. We were SO excited and a little bit nervous to see everything since the sample couch we sat on was a turquoise patterned couch and we almost had forgotten what we ordered. Wee! 

There are still some more changes to come in this room including reupholstering the red chair in the corner and getting a new chair where the rocking chair is. We’d also like to get a new rug and some curtains. 🙂 No matter what, I am so happy it no longer looks like this: 
Or this:

It feels great to have “almost finished” a room just prior to the New Year-at least to the point where we are comfortable snuggling up to watch a movie! Happy 2015, ya’ll! Thanks for following along in 2014 ❤
The WordPress.com stats helper monkeys prepared a 2014 annual report for this blog. How fun!

Here’s an excerpt:
A New York City subway train holds 1,200 people. This blog was viewed about 5,800 times in 2014. If it were a NYC subway train, it would take about 5 trips to carry that many people.
