
So…we started this project in July prior to our trip to Turkey. We knew from our pre-purchase asbestos testing that the glue holding those sexy beast faux brick tiles down contained asbestos. Since it was only 2% of the make-up of the glue, we figured we’d chance it and just rip the tiles up and cross our fingers we don’t die in 50 years of diseases caused by asbestos. When we took up the first tile, there was scary looking powder under it and we decided just to encapsulate it and cover it with some pretty wood flooring. 🙂 Safety first.
The first step in doing so was to lay down a layer of luan, just like we did in our kitchen floor update.

After that, we put a layer of rubber matting to reduce any possibility of having creaks in the future.

We then realized we would have to take our door down in order to install the wood flooring. I took that opportunity to wash the door and paint it.


While I was painting the door, Josh got to work on the wood floors. We rented a floor nailer from the Home Depot Rental Counter and it was amazing. So amazing Josh struck a pose for me.

It was a pretty quick job-we finished this portion of this project in just two days.


Then came the week before our vacation to Turkey and we were just not feeling up to home improvement. We had too much stuff to do, so basically all productivity stopped there. Then, when we got home from Turkey, we were playing catch up, I started a new job, and Josh’s work schedule got busier than ever. So…weeks went by and it stayed like this.
But here..enjoy some pictures of Istanbul, ya’ll! It was amazing. You need to add it to your bucket list.
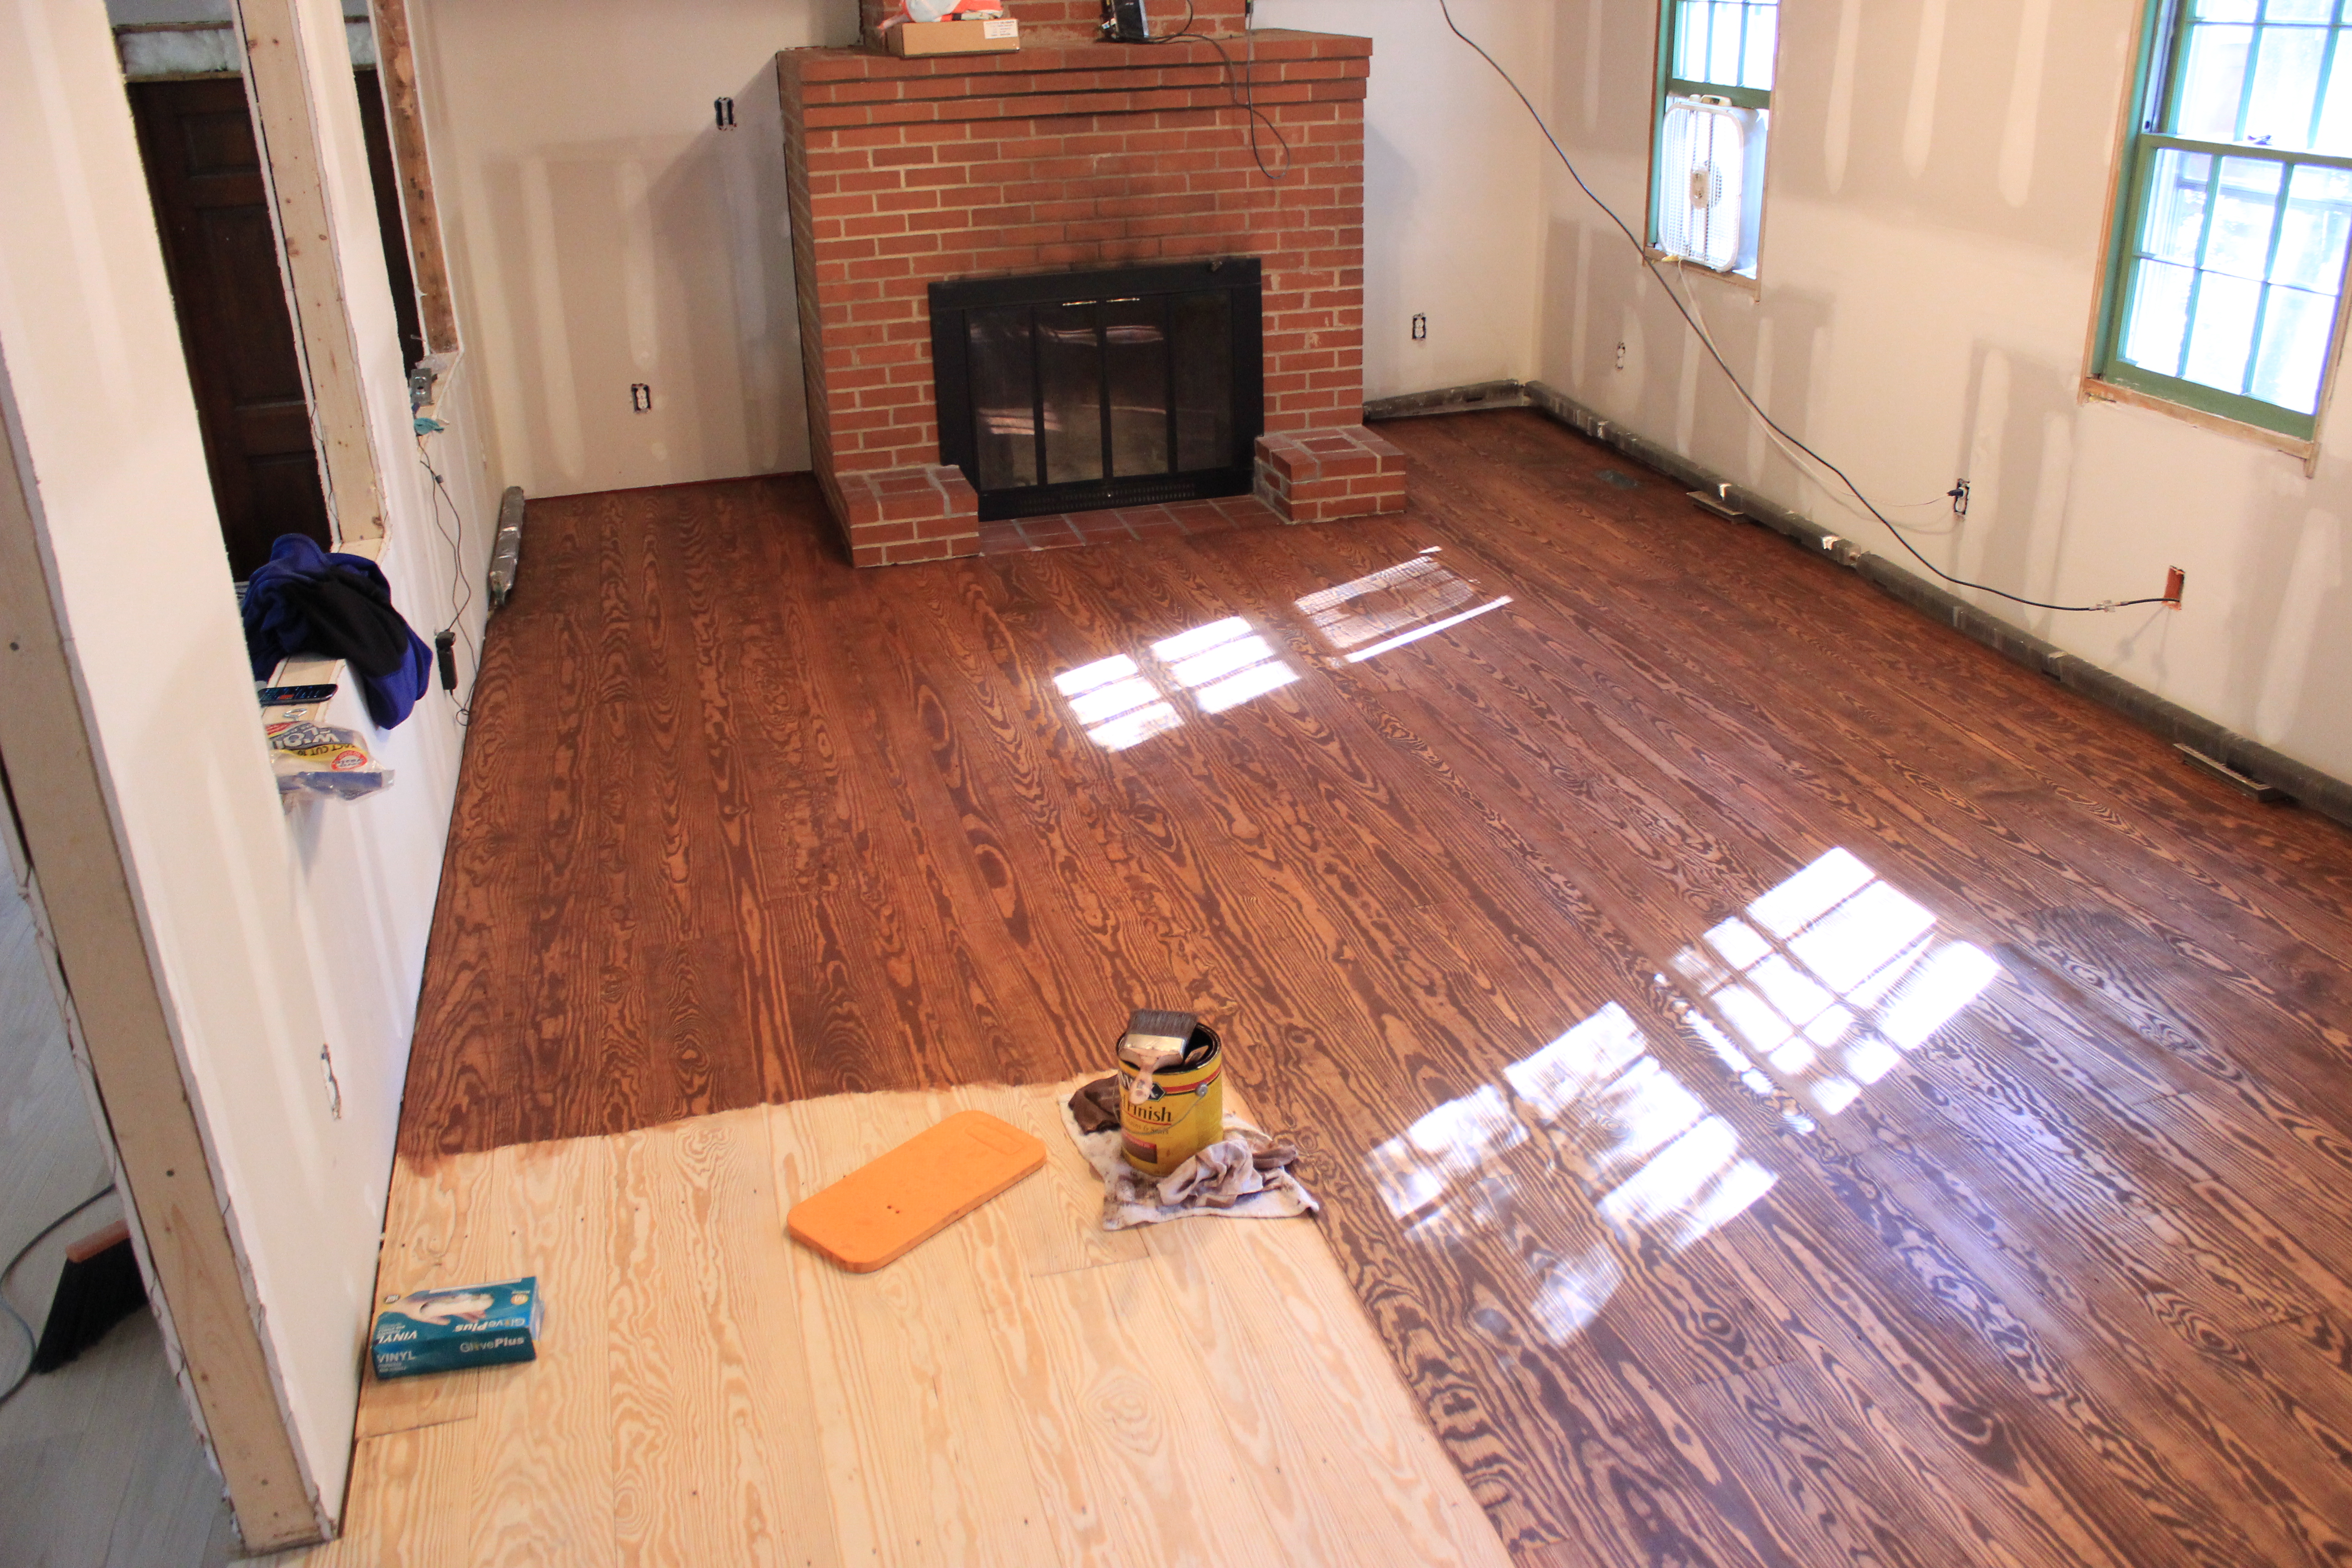
Anywho..so, when we finally got back to work, we rented two floor sanders and knocked it out in a day. The borders of the room took a few days more because we had to do it by hand. We tried many, many different methods to take off the stain around the border of the room, but found hand scraping with a paint scraper then following up with sanding with a coarse sandpaper on our Dremel Multi-Max Tool worked best. Our hand sanders didn’t get through the stain as well as the Multi-Max. That thing is my favorite tool ever.

We had previously decided we wanted to do a pretty dark floor and we fell in love with Minwax English Chestnut, but then once we got everything sanded, we started second guessing ourselves and thinking maybe a medium or light floor would be best. We debated for a while then agreed on Colonial Maple, stained a test area, then decided we hated it in this room. We ended up going with Minwax in English Chestnut. This is when I got myself back in to blogging mode and actually took pictures. 🙂


YAY! Doesn’t it look awesome?? We haven’t stained the floors in the sunroom yet, but we decided we are going to do the Polyurethane sealer in this room first, then tackle the sunroom after that. 🙂 We’ll keep you posted!

OMG! I love it and can’t wait to see everything in person. Also, the Turkey pics made me smile 🙂
Beautiful! I love the dark stain — and I’m a light colored flooring kind of gal. Looks amazing. 🙂
Looks awesome!
love it! thanks for sharing!
Wow this looks amazing! Love this color and am pretty set I am going to use it on my new kitchen floors.
Just one question – what finish did you go with, satin or gloss?
We just finished the final coat of poly and we ended up going with Satin. There was a semi-gloss option and we sort of wish we went with that. I absolutely loved how it looked when the poly was still a bit wet and was shinier. I didn’t love it enough to do another coat though. HAHA!
We will post a picture with the poly on it, as well as the products we used soon! 🙂